[Routeur] Firmware alternatif: passage à FreshTomato

Au début de l’année 2018, j’avais effectué de nombreuses transformation du côté de mon LAN, transformations que j’avais évoqué brièvement dans « Du côté du LAN« , s’en prendre le temps de rentrer dans les détails. A ce moment là, j’avais effectué un changement de firmware sur mon routeur R7000, afin d’utiliser AdvancedTomato. Interface moderne, gain en fonctionnalités et en personnalisation, il m’est difficile d’envisager un retour en arrière.

Petit bémol à l’horizon, il n’y a pas eu de mise à jour effectuée sur ce firmware depuis novembre 2017. C’est pourquoi, en ce début d’année 2019, j’effectue une nouvelle migration, cette fois vers FreshTomato. Le projet est actif depuis plusieurs mois déjà et semble globalement plutôt stable, d’après les retours que j’ai pu lire sur la toile. Le projet est un fork de TomatoByShibby, système qui constituait déjà la base de AdvancedTomato, AdvancedTomato apportant surtout une refonte graphique de l’interface.

Pour l’installation de AdvancedTomato, je m’étais aidé de la vidéo « Netgear R7000 – How to install Tomato-ARM » dont je retiens les étapes d’installation suivantes:

  • Remise à zéro de la configuration du système du routeur.
  • Installation de l’image initiale du firmware.
  • Installation de l’image AIO (All In One) du firmware.
  • Suppression du contenu de la NVRAM.
  • Redémarrage

Par ailleurs, j’avais noté cette discussion explorant les moyens de désactiver l’allumage des différentes LEDs du routeur et éviter l’effet sapin de Noël la nuit. Possibilité maintenant offerte directement dans l’interface web du firmware.

Parmi les autres informations à noter, les informations de connexion des deux images « initial » et « AIO » de FreshTomato sont les suivantes :

  • Initial image : admin/password
  • AIO image : admin/admin

Ayant eu besoin de davantage d’informations dans les logs, j’ai cherché comment augmenter le niveau de verbosité, la commande à utiliser est donc nvram set mwan_debug=8 suivie d’un nvram commit , 8 étant le niveau maximal et 0 le niveau minimal.

Après maintenant plusieurs jours d’utilisation, je n’ai pas détecté de problèmes particuliers une fois la connexion établie. J’ai toutefois rencontré quelques problèmes à l’établissement de la connexion, car celle-ci ne s’effectue pas correctement lors du premier échange de récupération des paramètres IP auprès du DHCP du fournisseur d’accès. Le routeur reçoit bien une IP (172.16.77.155) et un masque de réseau (255.255.255.255), mais pas de passerelle (0.0.0.0), donc pas de connexion WAN. Déclencher immédiatemment une demande de renouvellement du bail DHCP via le bouton renew de l’interface permet de recevoir une configuration valide. Il me semble donc que la première négociation effectué au démarrage ou après application d’une nouvelle configuration du réseau, n’envoie pas les options d’authentification 77 et 90 requises par le serveur DHCP.

Pour palier à ce problème, j’ai ajouté le script suivant dans l’onglet « WAN Up (main) », qui vérifie la présence d’une passerelle valide une fois la connexion WAN établie. Dans le cas contraire, la connexion est réinitialisée afin de forcer une nouvelle requête DHCP, valide cette fois.

if [ "$(nvram get wan_gateway)" = "0.0.0.0" ]; then
  service wan restart
fi

Afin de parer à toutes éventualités, j’ai également configuré la vérification périodique de l’IP de la passerelle, via le service de cron proposé par le firmware.

[[ "$(nvram get wan_gateway)" = "0.0.0.0" ]] && service wan restart

Reste maintenant à profiter de ce nouveau firmware et à croiser les doigts, pour que celui-ci soit aussi stable que son prédécesseur !

Préparation du système pour le Pi

Reprise synthétique des informations de la documentation officielle pour l’installation de l’image d’un système d’exploitation pour le Raspberry Pi depuis GNU/Linux.

Première étape:

  • Télécharger Raspbian.
  • Vérifier le hash du zip récupéré.
  • Extraire le fichier image de l’archive ZIP.
  • Lister les supports de stockage connectés avec lsblk.
  • Brancher la carte SD/microSD.
  • Réexécuter lsblk.
  • Noter l’identifiant correspondant de la forme mmcblk0 ou sdX (X, lettre minuscule non accentuée).
  • Si d’éventuelles partitions sur la carte sont montées, les démonter: umount /dev/sdX1.

Place ensuite à l’installation:

dd bs=4M if=2018-03-13-raspbian-stretch.img of=/dev/sdX status=progress conv=fsync

Enfin, exécuter sync afin de s’assurer que l’on peut retirer la carte sans risque.

Pour ma part, j’ajoute une étape supplémentaire consistant à activer SSH par défaut. Pour cela, il suffit de monter la carte et de créer un fichier vide nommé ssh dans la partition boot: sudo touch ssh (point de montage visible dans lsblk. On peut démonter toutes les partitions de la carte ensuite). De cette manière, le Pi devient accessible en SSH avec les identifiants par défaut dès son premier démarrage et on peut ainsi exécuter directement un script Ansible pour le configurer automatiquement.

Installing Cabot on Debian

Let’s say we want to install Cabot on a server, but not on AWS, nor on DigitalOcean. And because we like challenges, let’s just use Debian Wheezy 7.5 instead of the recommended Ubuntu 12.04 LTS. Ready?

We will try to follow Cabot quickstart to perform the installation.
But first, we must set up a few things. I’ve discovered that during installation, Cabot locks the password of the root account using passwd -l root. So be aware that you won’t be able to log with root and ssh if you haven’t set an authentication process using SSH keys. As The Hitchhiker’s Guide to the Galaxy would say: « Don’t Panic », you can reverse the process if you want using passwd -u root. As a security, you could always create another user with adduser mynewuser and give him an admin status by adding it to the suddoers file with visudo.

So let’s create our keys and configure ssh.
Generate the key:

ssh-keygen -t rsa

Now that we have a key named id_rsa.pub in our .ssh directory, we should do the following steps:

  1. Generate the key-file.
  2. Somehow get the key-file over to the right user-id on the right host.
  3. If that user doesn’t already have an « .ssh » directory, create one AND set its permissions to « 700. » (« rwx——« )
  4. If that user doesn’t already have an « .ssh/authorized_keys » file, create one AND set its permissions to « 600. » (« rw——-« )
  5. Append … don’t overwrite(!) … the new key to that file.

Or we can use ssh-copy-id:

 ssh-copy-id -i ~/.ssh/id_rsa.pub root@hostname.org

You should now be able to log in without having to type in a password.

Before going further, we need to install Fabric as it is used to provision the server and deploy Cabot.

pip install fabric

Fabric also requires some dependencies which are described on Fabric installation page.

Next step, clone the repository. I am using the deploy branch of lincolnloop fork which include awesome python packaging.

 git clone https://github.com/lincolnloop/cabot.git
 git checkout deploy
 cd cabot

Modify configuration: (might need to use development.env with the fork here)

 cp conf/production.env.example conf/production.env
 vim conf/production.env

Before doing anything, make sure you can or can’t install nodejs: aptitude search node. If nodejs can’t be found, you’ll need to install it manually.
A few changes before provisioning our server. Edit file bin/setup_dependencies.sh
and remove line 57 and 58:   ‘nodejs‘ and ‘npm’
Install nodejs manually, npm should come it.

fab provision -H root@your.server.hostname

Once it’s done, we can deploy cabot:

 fab deploy -H ubuntu@your.server.hostname

You should get an error because cabot is trying to use upstart but can’t find it.
To run Cabot, log in to your server under the user ubuntu.

 cd 2014-06-19-e662635

(Your directory will have a different name following a similar pattern year-month-day-wathever)

 foreman start

Congratulations, Cabot should now be running!

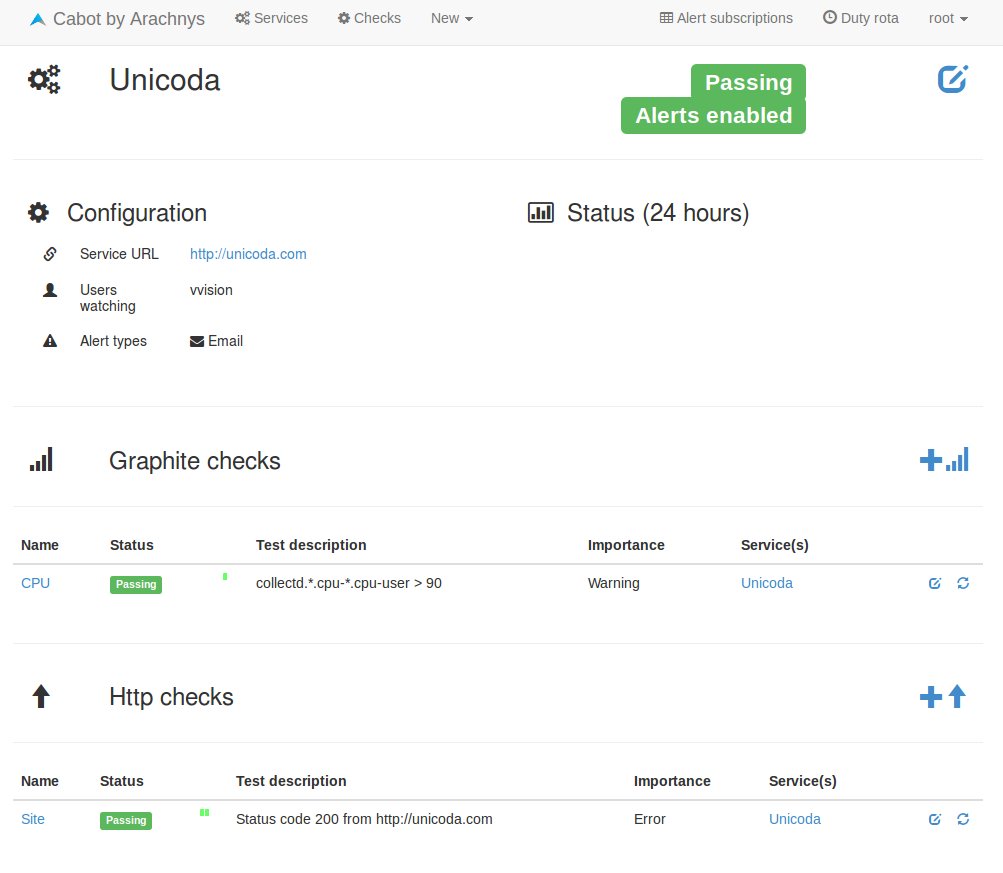
Cabot

Things to do

I will certainly add a simple init.d script to my Cabot fork so that we can run it easily. I will maybe change one or more things as the ubuntu username.

Understanding how to install and run Cabot took me a few hours. I got disturbed by the quickstart speaking of AWS or DigitalOcean server. I also tried to install it manually but didn’t manage to get it work, although I was close to it (I think. Or at least I hope ^^). Installing it on Debian added some difficulties, but nothing insurmountable. As a conclusion, I must say that Cabot is worth the effort. It provides a great way to monitor your service with Http checks and the possibility to alert based on Graphite metrics is just priceless.

Trying to install: Ghost

Ghost has been made public today in the afternoon. I was waiting for it so I tried to install it from the source code a few hours later. I followed the step listed in the file CONTRIBUTING.md. First, I had to install Ruby on my system, put it in the PATH and install two gems.

Installing Ruby:

PATH=$PATH:/home/user/.gem/ruby/2.0/bin
export PATH
source ~/.bash_profile

Installing the gems:

gem install sass
gem install bourbon

Then, I followed the instructions given by Ghost developers. I hadn’t any problems with the installation process, since it’s well documented.

Time for testing. I created a new user and a new article. I really like the markdown editor used to write posts. The interface looks great too. In my opinion, Ghost is very promising, many things are still missing, but everything should be there in version 1.0. So it’s highly possible that I will quit WordPress for Ghost.