Let’s say we want to install Cabot on a server, but not on AWS, nor on DigitalOcean. And because we like challenges, let’s just use Debian Wheezy 7.5 instead of the recommended Ubuntu 12.04 LTS. Ready?
We will try to follow Cabot quickstart to perform the installation.
But first, we must set up a few things. I’ve discovered that during installation, Cabot locks the password of the root account using passwd -l root. So be aware that you won’t be able to log with root and ssh if you haven’t set an authentication process using SSH keys. As The Hitchhiker’s Guide to the Galaxy would say: « Don’t Panic », you can reverse the process if you want using passwd -u root. As a security, you could always create another user with adduser mynewuser and give him an admin status by adding it to the suddoers file with visudo.
So let’s create our keys and configure ssh.
Generate the key:
ssh-keygen -t rsa
Now that we have a key named id_rsa.pub in our .ssh directory, we should do the following steps:
- Generate the key-file.
- Somehow get the key-file over to the right user-id on the right host.
- If that user doesn’t already have an « .ssh » directory, create one AND set its permissions to « 700. » (« rwx——« )
- If that user doesn’t already have an « .ssh/authorized_keys » file, create one AND set its permissions to « 600. » (« rw——-« )
- Append … don’t overwrite(!) … the new key to that file.
Or we can use ssh-copy-id:
ssh-copy-id -i ~/.ssh/id_rsa.pub root@hostname.org
You should now be able to log in without having to type in a password.
Before going further, we need to install Fabric as it is used to provision the server and deploy Cabot.
pip install fabric
Fabric also requires some dependencies which are described on Fabric installation page.
Next step, clone the repository. I am using the deploy branch of lincolnloop fork which include awesome python packaging.
 git clone https://github.com/lincolnloop/cabot.git
 git checkout deploy
 cd cabot
Modify configuration: (might need to use development.env with the fork here)
 cp conf/production.env.example conf/production.env
 vim conf/production.env
Before doing anything, make sure you can or can’t install nodejs: aptitude search node. If nodejs can’t be found, you’ll need to install it manually.
A few changes before provisioning our server. Edit file bin/setup_dependencies.sh
and remove line 57 and 58: ‘nodejs‘ and ‘npm’
Install nodejs manually, npm should come it.
fab provision -H root@your.server.hostname
Once it’s done, we can deploy cabot:
fab deploy -H ubuntu@your.server.hostname
You should get an error because cabot is trying to use upstart but can’t find it.
To run Cabot, log in to your server under the user ubuntu.
cd 2014-06-19-e662635
(Your directory will have a different name following a similar pattern year-month-day-wathever)
foreman start
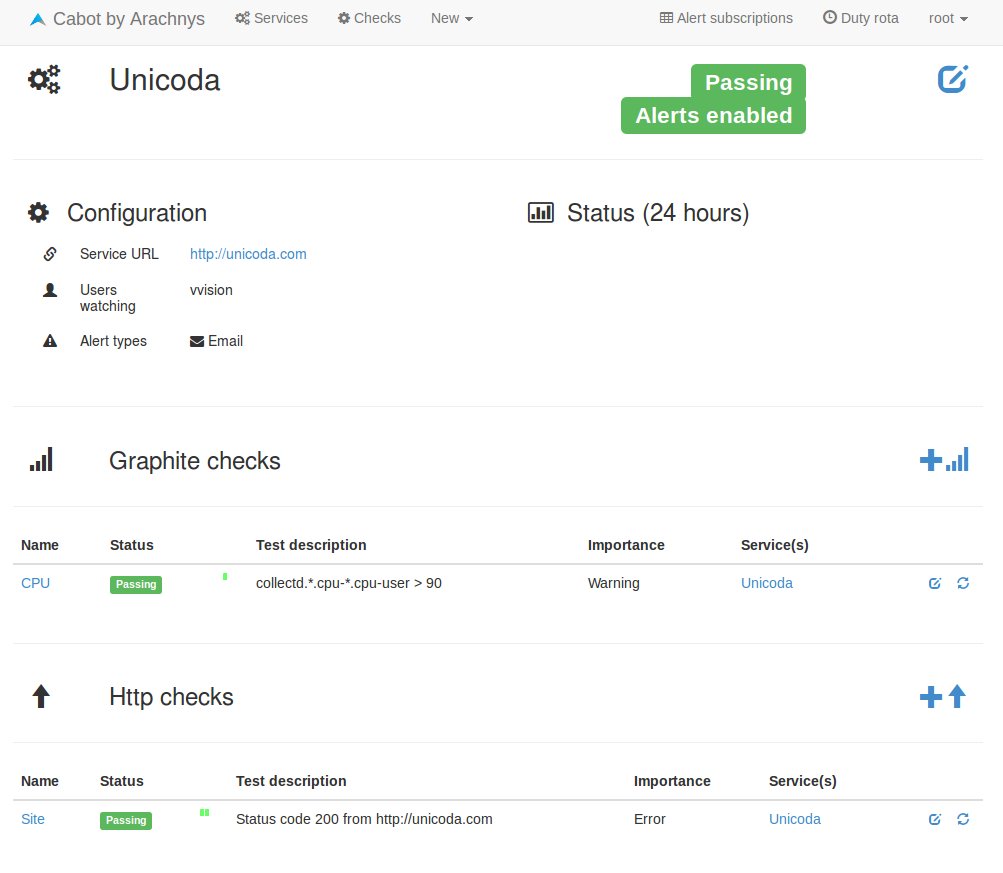
Congratulations, Cabot should now be running!
Things to do
I will certainly add a simple init.d script to my Cabot fork so that we can run it easily. I will maybe change one or more things as the ubuntu username.
Understanding how to install and run Cabot took me a few hours. I got disturbed by the quickstart speaking of AWS or DigitalOcean server. I also tried to install it manually but didn’t manage to get it work, although I was close to it (I think. Or at least I hope ^^). Installing it on Debian added some difficulties, but nothing insurmountable. As a conclusion, I must say that Cabot is worth the effort. It provides a great way to monitor your service with Http checks and the possibility to alert based on Graphite metrics is just priceless.
